Making UIs in haskell is a pain. Not because the libraries are bad, but because they are either hard to use or short lived. My reason for thinking this is because making UI bindings is just not a normal haskeller’s idea of fun. They may make a library, and then abandon it.
There is basically one UI library that has stood the test of time, and that is gi-gtk, whi is here because it’s auto-generated using gobject-introspection. You get a close to C interface (yuck), but at least they are well maintained!
But at work, I have made applications for embedded linux, and this is what I wanted to do in Haskell. The issue with GTK is that, not only is a nightmare, but it’s also designed for desktop applications. There is no way to launch a gtk application without either wayland or X server running for example. For this reason, I decided to make my own, probably short lived, GUI framework. I chose QML to base it on, because QML is what I have used at Work.
What I wanted Link to heading
I wanted a framework like brick. Brick is a fantastic framework for making TUIs. It uses what is increasingly called the “elm architecture”, meaning that you define two functions, one for drawing a UI from a state, and another for updating a state from events.
The downside is that your UI drawing function can get huge and complex. This is what I hoped to change in my QML library.
How to use my library Link to heading
First thing to note is that it isn’t published on hackage. This will remain the case
until it becomes stable (if that ever happens). You will have to use a cabal.project
file to download the git.
When you have the library, you include it with:
{-# LANGUAGE TypeApplications, DataKinds #-}

import Graphics.UI.Qml
To use the library, you first need to write some QML. The QML can get valued from an object exposed from haskell, and also call slots.
In the haskell, you need to specify two types:
- Your event type
- Your State type
For example, from the test application in the git:
type State = (Int, String)

data Event = Incr | Decr | Welcome String Int | Nop
We will then define two functions, one to map our state to a view model, and one to take events and update the state:
We start with the type:
viewController :: State -> QViewModel Event
Simple enough! We then need to create our object that we can call from QML:
viewController (count, msg) = rootObject "hs" $ do
This means from QML we can write hs.foo() to call a slot named foo, and we can use
properties such as hs.var.
Lets look at a slot:
qSlot "welcome" (CType @[String, Int])
    (\name age -> return $ Welcome name age)
We first give it a name for the QML, then we tell haskell about the type of the slot
using CType. We finally give a lambda for what to do with the arguments when the
slot is called. It must return some kind of event.
An example of a slot with no arguments would be:
qSlot "increment" (CType @'[])
    (return Incr)
We then move onto properties:
variables $ do
    qProperty @Int "Bar" 42
This would mean that from qml, hs.Bar is 42. You may need to tell haskell what the
type is if it can’t infer it! That’s what I have done with the @Int.
Normally, you wouldn’t use a constant, but rather a variable from your State type.
Things to note! Link to heading
Firstly, the slots will not work correctly if you don’t give GHC the -threaded option.
You can do this by adding ghc-options: -threaded to your cabal file in the executable
section.
Every call to your view controller function must contain every property!
Tying it all together Link to heading
We need to populate a type with our functions:
let app = QmlApp
    { qmlFile = QmlFile "main.qml"
      -- Example for loading from qt designer:
      -- qmlFile = QRC "test/gui.qmlrc" [":/imports"] "qrc:/gui.qml"
    , appUpdate = update
    , appViewModel = viewController
    , externalEvents = Nothing
    }
runQApplication app (0, "Fill out details")
And we are done! If you want other parts of your app to send events to the GUI part,
then you need to create a TBQueue e from the STM library. You can send events
that way!
Apps using it Link to heading
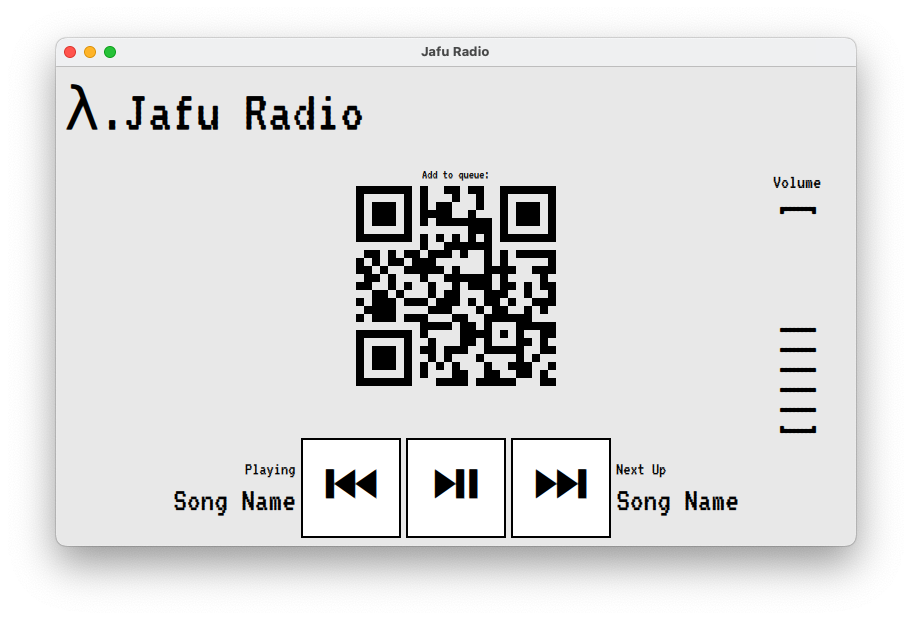
Well, so far, it’s only what I have made. I’m working on an audio player for raspberry pi,
where people can scan a QR code and add songs to the queue. Budget sonos! Here is a picture!